Manage project dependencies with direnv
This quick how-to will demonstrate how to use direnv to manage your project's dependencies. The first part will explain the rationale for using direnv for this purpose, but feel free to skip ahead to the examples.
Most developers are familiar with the situation where one starts to work on a project that requires a different version of a dependency than the one already installed on the local computer.
It might be a project that requires an ancient version of node when you have the latest installed, or it might be a requirement to use PostgreSQL 9.5 when you have 9.6 installed.
If you are a lang developer, you probably have a lang version manager
installed. But unless you're a javascript developer, a javascript version
manager is probably overkill for you.
Direnv, among its many other superpowers, allows you to configure your project's dependencies in a matter of seconds. Keep in mind that direnv does not take care of installing dependencies, but this is actually a good thing! Direnv doesn't mind how you install your binaries, so you can pick anything you like. For the upcoming examples we'll assume homebrew.
The approach we'll use is to install our binaries outside of the usual
$PATH, so anything outside our project will not have direct access to them.
To achieve this with homebrew, we have to unlink the formula after installing
(brew unlink <formula>), but this is not needed when installing a specific
version of a formula, like in the following example:
$ cd some-project
$ psql --version
psql (PostgreSQL) 9.6.10
$ brew install postgresql@9.5
$ brew --prefix postgresql@9.5
/usr/local/opt/postgresql@9.5
Copy the last line of the output because you will need it in the next step.
Once the binaries are installed we can proceed by telling direnv to add the
binaries we just installed to the $PATH, but only when we are inside our
project's directory. This is done by editing .envrc in the root of our
project:
$ direnv edit .
Once we save the file, direnv will update our environment variables:
direnv: loading .envrc
direnv: ~PATH
The correct version of psql is now in our $PATH:
$ psql --version
psql (PostgreSQL) 9.5.14
And that's it!
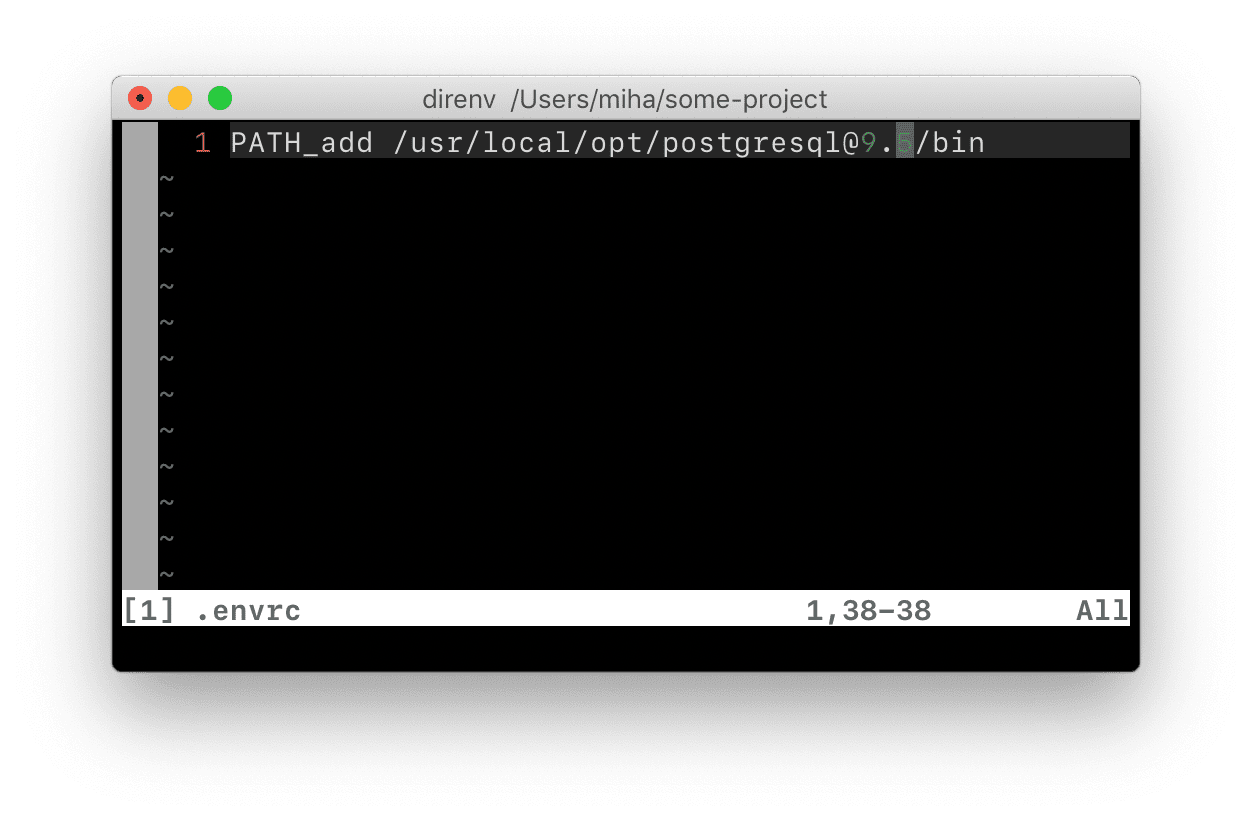
Bonus tip
Here is part of an .envrc file that I use in one of my
projects:
PATH_add /usr/local/opt/postgresql@9.5/bin
PATH_add /usr/local/opt/mongodb@3.4/bin/
PATH_add /usr/local/opt/elasticsearch@5.6/bin
PATH_add /usr/local/opt/node@8/bin
PATH_add ./node_modules/yarn/bin/
Here's the bonus tip: the last line allows me to use a version of yarn that was installed through npm.
Conclusion
Direnv is a swiss army knife for me when it comes to working in the terminal. I hope to see more developers taking advantage of its superpowers!
See also: Manage ruby versions with direnv.